Transitioning from the germination phase to the initial planting stage represents a critical juncture in the life cycle of the plant. Understanding exactly how to plant a germinated cannabis seed requires more than just manual dexterity; it necessitates a foundational understanding of seedling physiology and environmental management. Once the radicle, or taproot, has emerged from the protective shell, the biological clock begins to accelerate, making the seed highly susceptible to desiccation, light damage, and physical trauma. Success at this stage ensures that the plant establishes a vigorous root system, which serves as the structural and nutritional foundation for the upcoming vegetative growth. This guide explores the sophisticated nuances of the planting process, focusing on the preservation of delicate root tissues and the optimization of the rhizosphere. By adhering to precise technical standards during this transition, cultivators can significantly reduce the risk of damping-off and other early-stage pathologies that often plague novice and experienced growers alike.
A Technical Guide on How to Plant a Germinated Cannabis Seed
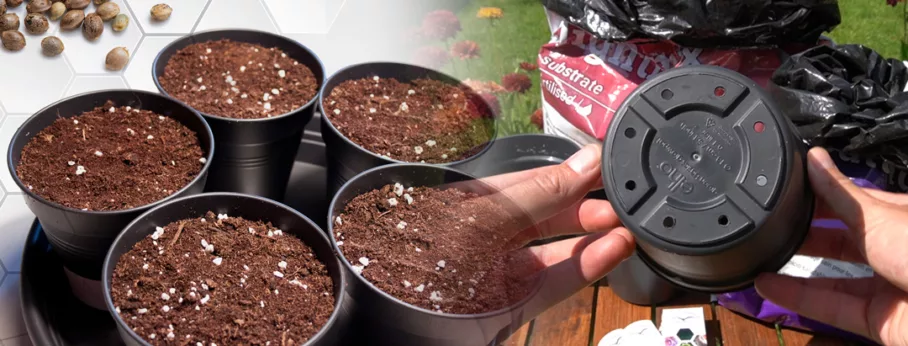
Medium“>Preparation of the Growing Medium
The choice of substrate is the first significant decision a cultivator must make after successful germination. Whether utilizing organic soil, coco coir, or rockwool, the medium must provide a balance of aeration and moisture retention. A common error involves using a medium that is too nutrient-dense, which can cause osmotic shock or “nutrient burn” in sensitive seedlings.
Before introducing the seed, the medium must be pre-moistened to ensure uniform hydration levels. This prevents the “wicking effect,” where a dry medium pulls moisture away from the vulnerable taproot. The pH of the water used for this initial hydration should be meticulously calibrated to ensure nutrient availability and prevent stress.
| Medium Type | Aeration Level | Nutrient Content | pH Buffering |
|---|---|---|---|
| Organic Potting Soil | Moderate | Variable (Often High) | Excellent |
| Coco Coir | High | None (Inert) | Low |
| Rockwool | Very High | None (Inert) | Poor (Requires Pre-soak) |
Step-by-Step Guide: How to Plant a Germinated Cannabis Seed
The actual placement of the seed is a procedure that demands precision and minimal interference. The primary objective is to position the taproot in a manner that allows it to descend naturally while the seed casing can be pushed upward by the developing hypocotyl. Always use sterilized tweezers or gloved hands to prevent the introduction of pathogens.
- Create a small indentation in the medium approximately 0.5 to 1.0 centimeters deep.
- Gently place the germinated seed into the hole with the taproot facing downward.
- Lightly cover the seed with the surrounding medium without compacting the material.
- Apply a minimal amount of room-temperature water to settle the medium around the seed.
Specific Depth and Orientation Requirements
Planting depth is a critical variable in seedling emergence. If the seed is buried too deeply, the stored energy within the cotyledons may be exhausted before the plant reaches the surface to begin photosynthesis. Conversely, planting too shallowly may result in “helmet head,” where the seed shell fails to shed because it did not encounter enough friction from the medium.
Handling the Fragile Taproot
The emerging radicle is composed of delicate cellular structures that are easily damaged by pressure or light. Any microscopic fracture in the taproot can lead to stunted growth or a total cessation of development. It is imperative to minimize the time the root is exposed to open air and direct light during the transfer process.
| Parameter | Ideal Range | Reasoning |
|---|---|---|
| Planting Depth | 5mm – 10mm | Balance of protection and emergence energy. |
| Medium Temperature | 21°C – 24°C (70°F – 75°F) | Optimal metabolic rate for cellular division. |
| Water pH | 5.8 – 6.5 | Ensures mineral solubility and root health. |
Optimizing Environmental Conditions for Seedlings
Once the seed is in the medium, the focus shifts to maintaining an environment conducive to rapid emergence. High relative humidity (RH) is essential, as the seedling has not yet developed a robust root system to compensate for moisture loss via transpiration. Using a humidity dome can help maintain an RH level between 65% and 75%.
Lighting should be gentle but consistent. While mature plants require high-intensity discharge (HID) or powerful LED systems, seedlings thrive under cooler, less intense light sources like fluorescent T5 bulbs or dimmed LEDs. This prevents photo-oxidative stress while providing enough energy to discourage “stretching,” a condition where the stem becomes excessively long and weak.
Common Pitfalls to Avoid During Transition
Many growers struggle with overwatering in the days following the initial planting. Excess moisture displaces oxygen within the medium, leading to anaerobic conditions that foster Pythium and other fungal pathogens. The medium should remain moist to the touch but never saturated or waterlogged.
Key Takeaways for Success:
- Maintain a sterile environment to prevent fungal infections like damping-off.
- Ensure the taproot is oriented downward to facilitate immediate gravity-sensing growth.
- Provide stable temperatures and high humidity to support early metabolic functions.
- Avoid premature fertilization; the cotyledons contain sufficient nutrients for the first several days.
How long does it take for the seedling to emerge?
Typically, a seedling will break through the surface of the medium within 24 to 72 hours. This duration depends heavily on the vigor of the genetics and the consistency of the environmental temperature. If no emergence is seen after five days, the seed may have failed due to depth issues or moisture extremes.
Should I remove the seed shell manually?
It is generally advised to let the plant shed the shell naturally. Manual removal often results in the tearing of the cotyledons. If the shell is stuck for more than 24 hours after emergence, you may apply a single drop of water to soften the casing before very gently attempting removal with tweezers.
When should I start giving the seedling nutrients?
Nutrients are usually unnecessary until the plant has developed its first set of “true leaves” (the serrated leaves following the rounded cotyledons). Starting nutrients too early can lead to toxicity, as the young root system is highly sensitive to salt concentrations in the substrate.

If some one wishes to be updated with most up-to-date technologies therefore he must be visit this website and be up to date every day.